Git Environment on Windows
Published on
It is probably evident from previous posts on my blog that I like Git and working with it from within PowerShell. In the past I have talked about tweaking the PowerShell prompt to add git stats and setting up SSH-agent to work from PowerShell, however I have never actually gone through my entire Git/Windows environment and the steps taken in order to set it up. I thought it was time I did.
Ingredients
Like most Windows Git users, I use the excellent MSysGit. This provides us with all the Git, SSH and Bash binaries, packaged up in a nice friendly installer. Rather than sticking with the MSysGit-provided Bash shell however, I use PowerShell. If you are using any modern version of Windows this will be installed already. It can also be added for those people who are stuck with (or still prefer) Windows XP (link).
In addition to these basic tools, I use the following:
- Console – excellent terminal application with multiple tabs and customization options
- DiffMerge – pretty decent diff/merge application
- Notepad++ – great text editor with tabs, syntax highlighting and no nonsense
Installing & Setting Up Git
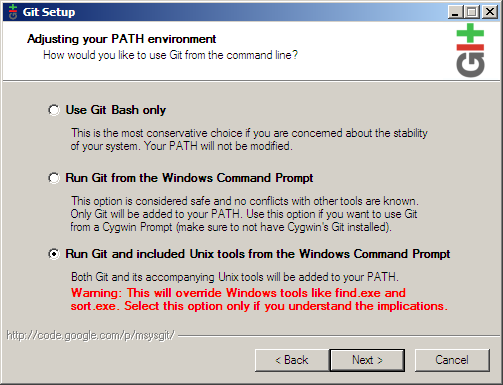
Installing MSysGit is simply a case of running the installer. However it is well worth remembering to choose one of the two options which allows use of the Git commands from the Windows command line (and by extension, PowerShell), otherwise you will be limited to using Git from inside the Bash shell it installs (making this entire guide a bit pointless). I normally use the last option and have found it has no ill effects for my uses.
The next two steps ask you which SSH client you'd like to use and which style of line endings to use. I always select OpenSSH and recommend doing the same unless there's a particular need not to. I always set line endings to use Windows (since I'm almost always working with Windows-centric projects when I'm working from Windows), but feel free to select whichever setting will work best for you.
First of all, you should tell Git who you are. Fire up a PowerShell instance and run the following commands (substituting your name & email for mine of course).
git config --global user.name "Mark Embling"
git config --global user.email "no-spam-please@markembling.info"
Assuming this completed without issues, Git should be ready to use. Feel free to set up or clone your repositories now or later. Git will use the user information you have given it on all your future commits.
Notepad++ and Git
Installing Notepad++ is again a case of just running the installer. Git can be made to use Notepad++ for all its editing (commit messages for example) using the following command (substituting the path as appropriate).
git config --global core.editor "'C:/Program Files (x86)/Notepad++/notepad++.exe' -multiInst -notabbar -nosession -noPlugin"
The various flags tell Notepad++ not to display the tab bar, load plugins and a couple of other appropriate settings. Note the position of the single and the double quotes - I've been caught out by missing them out in the past.
Setting Up DiffMerge
Sometimes during development it is inevitable that you will encounter conflicts where you have modified a given section of a file and someone else you are working with has made a different change to that same file. Although Git has some pretty good smarts when it comes to merges, sometimes it will be impossible for it to resolve automatically. When this happens, there is nothing worse than having no decent merge tool. Sometimes you just want to see what changes you've made - again, having a decent tool helps immensely here. DiffMerge serves both of these purposes well, and can be tied in to Git so that you can call up a diff or a merge when necessary with a single command.
Once again, installation is a simple installer. Once it is installed, it needs to be hooked up to Git. You will need two small scripts, mine are below (again, change the paths as appropriate). I have placed these in C:\Program Files (x86)\git\etc\wrappers, but you can place then wherever suits you best.
git-diff-diffmerge-wrapper.sh:
#!/bin/sh
"C:/Program Files (x86)/SourceGear/DiffMerge/DiffMerge.exe" "$1" "$2"
git-merge-diffmerge-wrapper.sh:
#!/bin/sh
"C:/Program Files (x86)/SourceGear/DiffMerge/DiffMerge.exe" "$1" "$2" "$3" --result="$4" --title1="Mine" --title2="Merging to: $4" --title3="Theirs"
Having created these wrapper scripts, they can be hooked up to Git inside your Git config file found at C:\Users\<You>\.gitconfig (or C:\Program Files (x86)\Git\etc\gitconfig to affect all users). Add the following sections to the bottom of the file:
[diff]
    tool = diffmerge
[difftool "diffmerge"]
    cmd = 'C:/Program Files (x86)/Git/etc/wrappers/git-diff-diffmerge-wrapper.sh' "$LOCAL" "$REMOTE"

[merge]
    tool = diffmerge
[mergetool "diffmerge"]
    cmd = 'C:/Program Files (x86)/Git/etc/wrappers/git-merge-diffmerge-wrapper.sh' "$PWD/$LOCAL" "$PWD/$BASE" "$PWD/$REMOTE" "$PWD/$MERGED"
    trustExitCode = false
    keepBackup = false
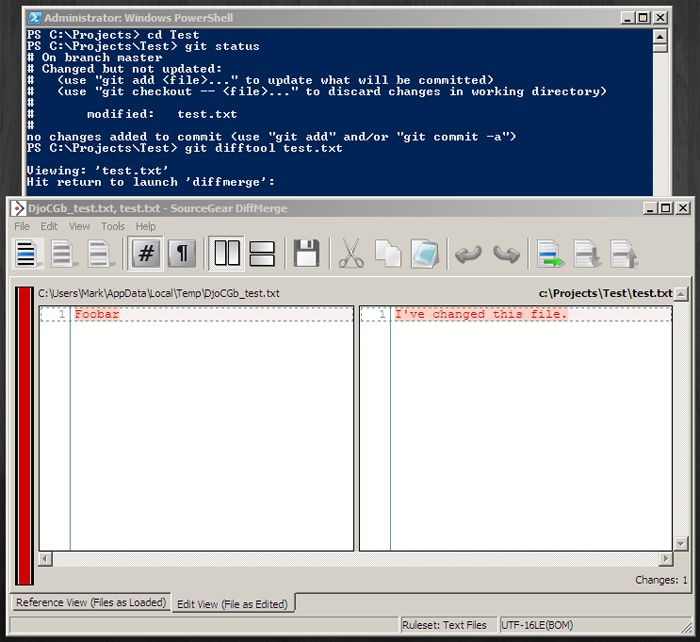
Now that DiffMerge is hooked up to Git, you will be able to use git difftool and git mergetool at the command line to open it up. For example, if you have made changes to a file which you have not yet staged for commit, git difftool (for all changed files – it will open them one after another) or git difftool <filename> (if there's a particular file you want to know about) will allow you to compare your changes with how it previously looked. It can be quite useful to recap what changes you've made prior to a commit. Using the git diff and git merge commands will still fire up the built-in (and quite frankly terrible) tools.
Setting Up Console
Installing Console is simply a case of downloading the binaries and copying them to a convenient location. The program's settings are stored alongside it so it is easily carried from one machine to another if necessary.
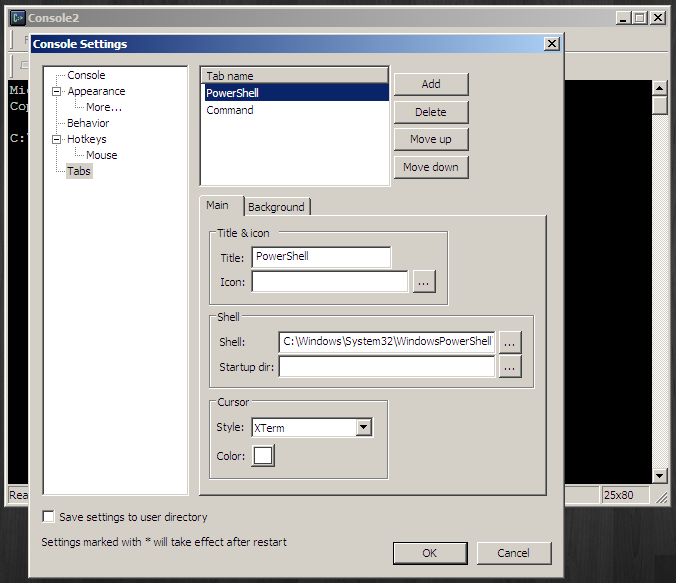
The default settings for Console have it set up to use Command.exe. I normally set up a new tab (Edit → Settings) which uses PowerShell and set it as the default tab type by moving it to the top of the list. The path to the PowerShell executable is generally something like C:\Windows\System32\WindowsPowerShell\v1.0\powershell.exe. Settings like the background colour, tab icon, cursor appearance and more can also be tweaked to your liking.
PowerShell Extras
Whenever I set up a new Windows environment, as well as installing everything I've written about here I always change my PowerShell prompt to give me Git information whenever I'm within a Git repository. As I touched on in the introduction, I have written about it and provide the scripts which can be integrated into your PowerShell profile.
In addition to this, I also use another script which integrates SSH agent into the PowerShell environment. This is something else I've written about. Note that this relies on the ability to run the ssh-agent binary, so this needs to be located somewhere in the PATH.
Feel free to use these as you wish, I find it makes the whole Git/PowerShell experience feel that bit more efficient and polished.
More Resources
Jeremy Skinner has written a great guide to getting started with Git. It is written focusing on GitHub and the MvcContrib project, but is relevant to Windows Git users generally. It's worth noting he makes a couple of slightly different choices to me regarding his setup, so my best advice would be to pick whichever fits your environment and workflow best.
A couple of other resources worth checking out:
- git ready – site dedicated to Git tips and tricks
- Git cheatsheet