Adding a Maker's Mark to 3D Prints
Published on
Just as clothing producers add labels to their product, blacksmiths add a touchmark and artists sign or stamp their work, sometimes it can be useful to be able to stamp your own logo or 'maker's mark' into objects which you 3D print.
There are many different ways of doing this and anyone who works with 3D models or modelling tools will likely have a preferred approach and tools to use. However I've never been much of a 3D modeller but am very much a developer, so I'm tackling it using a tool which plays to my strengths by being code-based: OpenSCAD.
Your Logo
It goes without saying that it's difficult to go any further without having a logo or mark ready to use. For the purposes of this article, I'm assuming you have a logo in vector format, either as an SVG or in a format which can be exported to SVG (such as an Adobe Illustrator or Affinity Designer file).
Steps
Once you have an SVG logo ready to use, this is the process:
- Import the SVG logo into OpenSCAD
- Scale the logo to the required size and extrude to form a 3D shape
- Subtract the logo from your object to press it into the surface
If you're building a complete object in OpenSCAD, in step 3 you simply need to move the logo to the right place on the model. Although this will be specific to your model, you'll probably know exactly where that is — or more accurately, how to derive the appropriate location.
Alternatively, you might already have an STL file which you just want to imprint. This works too, since you can import STL models into OpenSCAD. The process is the same, but it might be a little bit harder to find the exact sweet spot to place the logo. I usually just eyeball it to get it in the ballpark, and then zoom in to place it with adequate precision.
The Process in Action
Defining a Logo Module
I've found its easiest to define a module which provides the logo. A module in OpenSCAD is a reusable chunk of code (think of it a bit like a function) which performs actions, but does not return any values. It can, however, take parameters. I like to define mine such that it provides the logo with the given size and depth.
This can just sit at the top of the file.
module make_logo(width, depth) {
    resize([width,0,0], auto=[true,true,false]) {
        linear_extrude(depth + 0.1) {
            import("logo.svg");
        }
    }
}
If we were to then call this with a desired width and depth, it would just create a solid object which represents the logo we wish to stamp.
make_logo(15, 1);
Stamping the Logo
Actually stamping the logo into the object is a case of rotating it and moving it into place, and then subtracting it from the object using the difference operation.
In this case, we're adding the logo to an existing STL file. If the entire object was being built in OpenSCAD, all the necessary code for creating the object would appear in place of the STL import.
difference() {

    // Import the existing STL model file
    import("sample_object.stl");

    // Coordinates 79.8, -48.5, -8.5 correspond to the exact spot
    // on the surface of the model where I want to place the logo.
    // The logo depth is subtracted to this to press the logo into
    // the model.
    logo_depth = 1;
    translate([79.8-logo_depth, -48.5, -8.5]) {
        rotate([90,0,90]) {
            // Make the logo (15mm wide, depth of the logo_depth variable)
            make_logo(15, logo_depth);
        }
    }

}
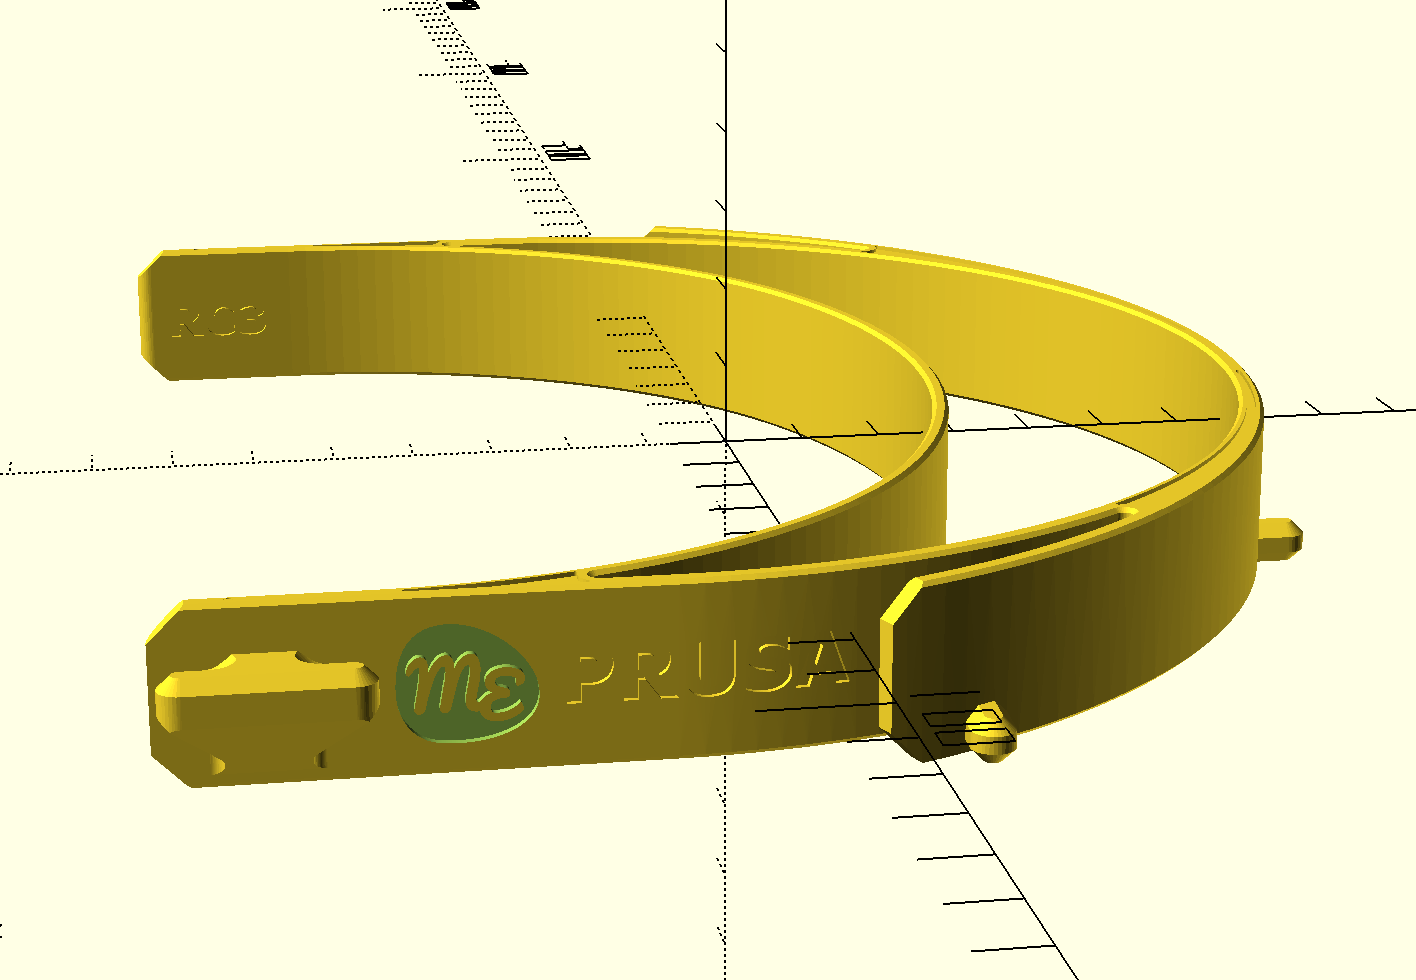
The object I've used in this example is the Prusa Face Shield RC3 headband by Prusa Research. I happened to have this STL file on hand from printing the face shield frames over the last couple of months.
Examples on GitHub
I've put together a couple of examples based on the above code which are available on GitHub. These use the same approach as my example snippets below and hopefully make it a little bit easier to follow what's going on, particularly if you aren't familiar with OpenSCAD or particularly proficient with scripting or programming in general.
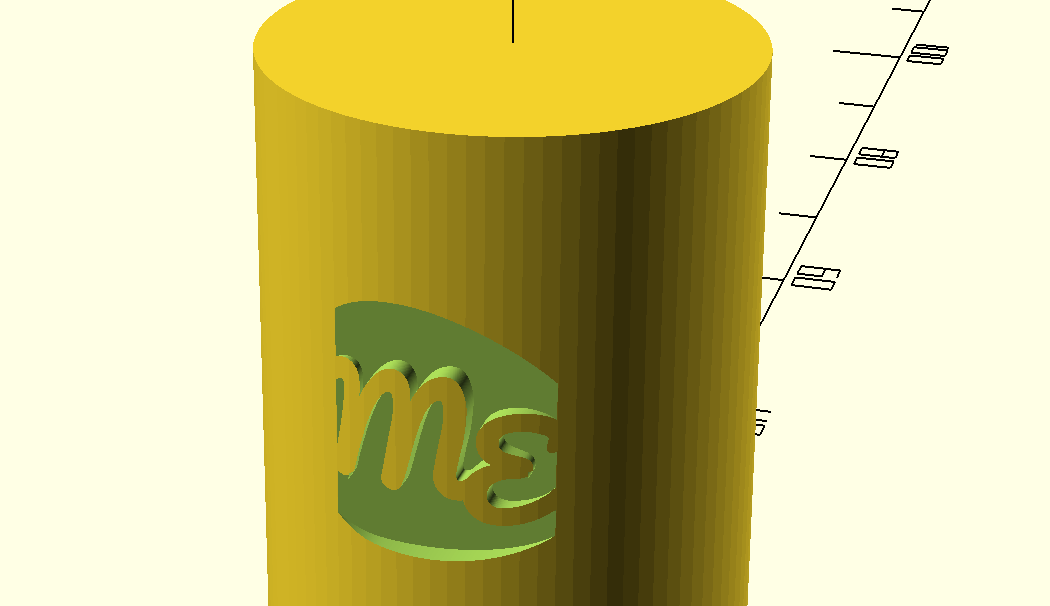
Curved Surfaces
A caveat with this approach is that it doesn't really work when dealing with pressing the logo into a tightly curved surface like the side of a cylinder or sphere for example. This is because the logo is effectively on a flat plane and therefore it'll end up needing to appear pressed in further towards the middle and less at the edges - or worse, the opposite if it's within a valley. This might not be the effect you necessarily want.
I generally work around this by just ensuring it's stamped into a pretty flat area of the model as that's where I'd prefer it anyway, but may revisit the issue of curves if it ever really becomes a need.