Drobo & DroboShare
Published on
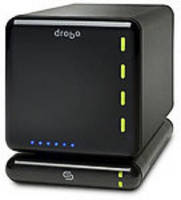
Recently I bought a Drobo, a storage device which takes up to four SATA hard drives and combines them together to form a large volume whilst at the same time providing protection against drive failure or corruption.
Drobo comes with the ability to connect locally like any other storage device via USB or Firewire 800. It is also possible to connect it to your network using a DroboShare. I chose this option and bought the Drobo and DroboShare bundle from Ebuyer.
First Impressions
 As I was unboxing the Drobo and DroboShare, the first thing which struck me was the quality of the packaging. Both the Drobo and DroboShare came in their own boxes with well put together inner sections. The devices themselves were carefully wrapped in cloth covers. Unfortunately I did not take any pictures of the unboxing process.
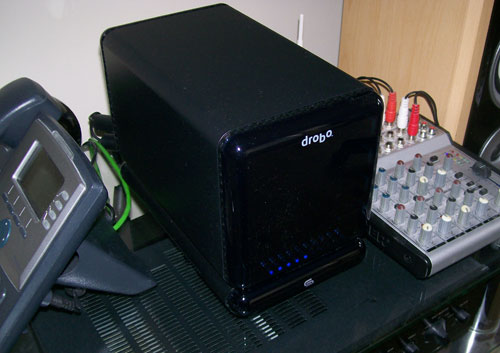
As I got the devices out, it became apparent that the solid well-put-together feel of the packaging extends to the units themselves. It seems the Drobo is solidly put together out of good quality materials. Its worth noting that the glossy front panel does seem somewhat prone to attracting dust though. In addition, the device seems longer in real life than it looks in picture, although not unreasonably so.
As well as the devices themselves, the boxes contained easy setup instructions, a full manual, the device software (Drobo Dashboard), all the necessary cables and the usual warranty documents.
Setting Up
Setting up the Drobo and DroboShare was easy. It was simply a case of placing the DroboShare down and hooking it up to the network and plugging in the short USB cable it was provided with. The Drobo device could then be placed on top and the other end of the USB cable connected to the USB socket on the back. I also took this opportunity to plug in a 500GB and a 250GB hard drive, leaving two drive bays available for expansion. Finally, I just had to connect the power cable to the mains and plug it into the supplied Y-splitter, which was connected to both the Drobo and the DroboShare. It then began it's first power-up.
The next step was to initialize (format) the Drobo. This only needs to be done once, and it tells Drobo what volume size to use. Being a typical male geek, this confused me for a moment since I hadn't read any of the documentation, but it turns out that Drobo pre-formats itself with a given volume size (which you can choose) regardless of the current capacity of the drives. The default volume size is 2TB, but you can select from between 1TB and 16TB. I chose 4TB (the larger the size, the longer the boot time). What this means is that I can continue to add and replace hard drives with larger ones as I see fit, but if the capacity grows to the point where the available space (after protection) goes over 4TB, Drobo will automatically add a second volume. Since I'm sharing my Drobo using the DroboShare, each volume appears as a network share.
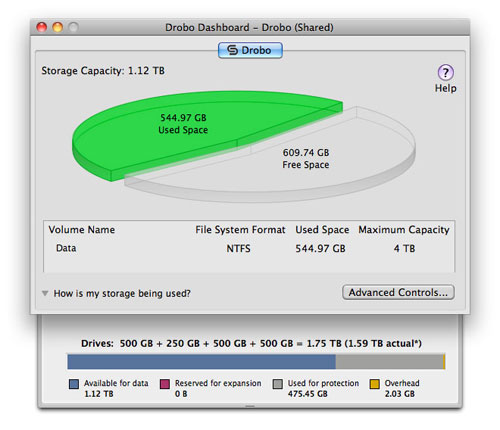
It is well worth noting that since the volume size is set to a maximum of 4TB, my computers see it as that size (not its "actual" size). This could be confusing if you often rely on Windows or OS X to tell you how much free space you have left, as it will most likely not match reality. However the Drobo guys provide Drobo Dashboard, which does report the correct free space and the Drobo itself has a row of blue LEDs along the bottom which give an at-a-glance view of space used.
Using Drobo & DroboShare
Using the Drobo (with DroboShare) is just like using any shared volume. Simply find it on your network and copy files to it, read files from it and use it as you normally would. You will notice above that during the setup procedure all I had to do was install Drobo Dashboard and it all automatically worked. It automatically detected the devices on the network (since it'd picked up an IP via DHCP). Using Drobo Dashboard you can assign it a static IP and change its name and the volume names to whatever you prefer.
The reason I bought the Drobo was to take three hard drives I had sat in a spare computer full of movies, music and other data. Up until now I had to turn that machine on every time I needed to get to it and it was really beginning to become annoying. Having it always accessible over the network is much more convenient. However, this presented an interesting challenge.
Drobo & Capacity
The Drobo automatically allocates space for data and space for protection of that data across however many drives are installed. This means that the data is always protected against failure of a drive if there are two or more installed. Imagine RAID which automatically adapts to the number of drives without the need to reformat or rebuild and you are pretty much there. However, it turned out that Drobo does need at least two hard drives at whatever size your largest hard drive is in order to not waste space.
This turned out to be a bit of a problem for me. As I mentioned before, my data was split across 3 drives: 250GB + 500GB + 500GB. I had moved it all from two of these (the 250GB and one of the 500GBs) onto just the other 500GB and a space 250GB external drive, allowing me to take one 250GB and one 500GB drive to put into the Drobo. I then began the very lengthly task of copying all my data (near enough 600GB) from the machine to the Drobo.

You'll remember I said that if you put one large and one small drive in, there is some wasted space. The diagram above shows this - the purple portion is not available. There was not nearly enough space for all my data, not even the data from the 500GB drive only. My original plan was to copy the data from this drive over, then take the drive out of the computer and put it into the Drobo in order to then copy the data from the external drive over. This clearly wasn't going to happen after all, and I'd already started the copying process. This presented a bit of a problem: I had no other spare drives. Since the copy was still taking place and I had no wish to stop it (and no other plan of action even if I did), I decided the only thing I could do was an emergency trip to PC World for another drive. Thankfully it was only 19:40 so they were open for another 20 minutes. Having returned with another 500GB drive (and £54.99 lighter - thanks PC World), I could stick the new drive in providing enough space.
Here is the beauty of Drobo. You can stick in new drives and even pull one out while it is running. Not only is it hot-swappable, it doesn't miss a beat. I put the new drive in and within seconds it had recalculated the space available to account for the new drive's presence, all the while still copying over my data. Which could now fit thankfully.

It is well worth bearing this little quirk in mind when buying a Drobo to ensure you don't force yourself into an emergency drive buying trip like I did. You can use the Drobo Calculator to find out what would result from your chosen combination. The blue "available for data" section is the actual usable space you get. The grey "used for protection" section is the space used to ensure you are protected against drive failure. Ideally you don't want any of the purple "reserved for expansion" showing as this is effectively wasted space.
Final Thoughts
It is worth remembering that the Drobo is fully automated. This means it will sometimes spin up randomly for apparently no reason in order to do maintenance to itself (defragging and so on). For this reason, you may not want to put it in your living room or bedroom if you object to the sound of a fan and hard drives spinning up. It is not loud, but the noise level does exceed that of the average desktop computer fan occasionally.
Another point worth making is that the Drobo Dashboard software is not required - you can use the Drobo like any network share from any machine. However it does seem to be required for setting it up and I would recommend installing it on your main machine so you can keep tabs on storage space and make changes to settings if necessary from there. I have it installed on my iMac, and both Windows and OS X versions are provided (but no Linux unfortunately).
Overall, I very much like the Drobo. It takes the idea of redundant storage and makes it painless and easy. All you need to bring to the table is a bunch of standard 3.5" SATA hard drives and it will do the rest.
My final configuration contains three 500GB drives (bays 1, 3 and 4) and one 250GB drive (in bay 2).
This provides me with just over 1.1TB of storage space, all completely protected against drive failure. And if a drive failure does occur, one of the lights on the front of the Drobo will turn red to alert me and I will simply pop it out and push in a new one. Drobo does the rest.
Would I recommend it? Yes, definitely.